Choosing all in one solar street lights is not simply a matter of comparing prices. The right fixture must survive weather, provide dependable illumination, and match the road’s actual needs. A product that performs well in a sunny showroom may struggle beside a shaded highway. Real conditions matter.
This guide presents seven practical tips for evaluating an all one solar system before purchase. It examines lighting output, battery chemistry, solar panel efficiency, controller quality, pole compatibility, installation requirements, and after-sales support. Look beyond impressive marketing numbers. Ask for photometric files, battery capacity, operating temperature ranges, and independent test reports. A trustworthy supplier should explain these details clearly.
Small details can change the result. Check whether the lamp maintains brightness throughout the night, or only during its first few hours. Confirm the waterproof rating and inspect how cables, seals, and battery compartments are protected. Review the warranty carefully. Some warranties cover the complete one solar unit, while others exclude batteries or controllers.
A low quotation may be attractive. It may also conceal weaker components. I have seen projects underestimate winter darkness, tree shadows, and maintenance access. That mistake becomes expensive after installation. Before approving a purchase, compare samples, request a lighting simulation, and test performance under realistic conditions. No product is perfect. Careful questions reduce avoidable surprises and support a safer, more reliable investment.
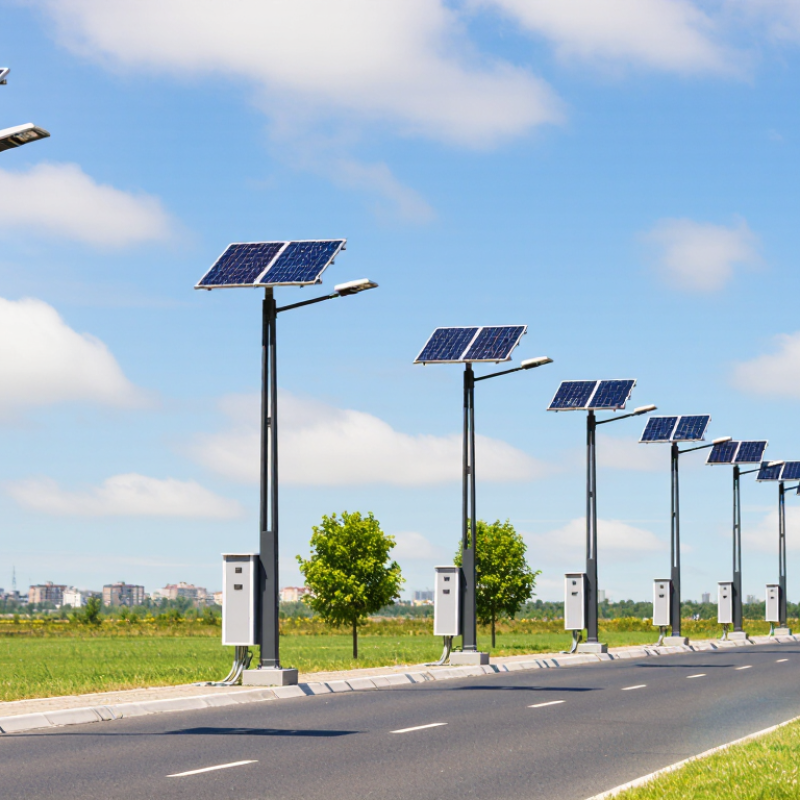
An all-in-one solar street light combines the solar panel, LED lamp, battery, controller, and housing in one unit. Each component affects nighttime performance. A high-efficiency panel helps during cloudy seasons, but it cannot solve every problem. Battery capacity matters more during long winter nights. Check its usable capacity, charging cycle rating, and expected replacement period.
The LED module should provide steady brightness, not only impressive peak lumens. Examine the beam angle, color temperature, and heat management. Aluminum housing can help release heat. A sealed enclosure also protects internal parts from rain and dust. Look for an appropriate IP rating, but do not treat it as permanent protection. Installation quality still matters.
Tip: Ask how the controller manages overcharging and low battery voltage. Motion sensors can reduce energy use, yet poor calibration may cause annoying delays. Check whether brightness settings are adjustable. I once underestimated tree shadows near a light pole; the panel received less sunlight than expected. That mistake changed the required battery size. Review the site during different seasons, measure pole spacing, and confirm local electrical requirements before purchasing. A simple field test is often more useful than a glossy specification sheet.
Before buying all-in-one solar street lights, measure the real lighting need at night. Walk the road after sunset, not only during daylight. Record its width, traffic level, nearby homes, and dark corners. A narrow residential lane may need fewer lumens than a busy junction. However, brightness alone can mislead. Check the light distribution pattern and target even illumination across the road. Harsh glare can disturb drivers and reduce practical visibility.
Study the installation site carefully. Note trees, buildings, walls, and seasonal shadows that may block the solar panel. A panel receiving six hours of summer sun may receive far less in winter. Use a compass and observe the site at different times. Pole height, ground strength, wind exposure, and maintenance access also matter. The fixture may be compact, but it still adds weight above the pole. A weak foundation is a poor saving.
Match battery capacity with local weather and required lighting hours. Ask for tested performance data, not only attractive laboratory figures. Check operating temperature, water and dust protection, charging control, and expected battery life. Motion sensors may reduce energy use, but they can feel uncomfortable on quiet streets. I once underestimated tree growth near a planned installation. The shade appeared harmless then. It was not. Leave space for future changes, and confirm that local lighting requirements and qualified installation practices are met before placing an order.
Choosing an all-in-one solar street light requires more than checking brightness. In field inspections, I compare the solar panel, battery, and LED as one system.
Tip 1: Check panel wattage against local sunlight, not marketing claims. A 120-watt panel may perform poorly under frequent clouds.
Tip 2: Review the panel’s conversion efficiency and charging performance. Ask for test data under realistic conditions.
Tip 3: Confirm the battery chemistry, capacity, and operating temperature range. Battery details matter most during long winter nights.
Tip 4: Calculate usable battery capacity, not only rated capacity. A larger battery can still deliver weak nighttime performance if its protection settings are restrictive.
Tip 5: Check expected cycle life and replacement access. Service planning is easy to overlook.
Tip 6: Compare LED efficacy, measured in lumens per watt, and examine the light distribution. Brightness alone does not prove good road coverage. A narrow beam can leave dark edges.
Tip 7: Inspect the controller’s dimming schedule and sensor response. Adaptive lighting can extend battery life, but poor programming may reduce safety.
Ask for independent photometric reports and battery test records. Also inspect the housing, seals, and thermal design. Heat quietly shortens LED and battery life. I would not trust a perfect performance promise without installation details. Small errors in panel angle, shading, or pole height can change results. A practical comparison should include one full night of operation after several cloudy days.
7 Tips for Buying All-in-One Solar Street Lights
Durability should match the installation site, not just the sales sheet. Check the housing material, corrosion resistance, and IP rating for rain and dust protection. An IK rating also helps assess resistance to accidental impact. Examine the solar panel mounting points, cable seals, and battery compartment. These small parts often fail before the lamp itself. Ask for test reports, operating temperatures, and clear warranty conditions. A higher rating alone does not guarantee long service.
Battery quality deserves close attention. Request usable capacity, expected cycle life, charging limits, and replacement procedures. Lithium batteries may perform well, but extreme heat can shorten their life. The light should provide automatic dimming and motion sensing without leaving dark areas. Useful smart features include remote status checks, fault alerts, timer settings, and energy records. Confirm whether the controls work offline and whether software updates are supported. Complicated systems can become inconvenient.
Maintenance should be practical for the actual location. Check how easily workers can clean the panel, open the battery compartment, and replace key parts. Dusty roads may require cleaning every few months. Record battery voltage and nighttime runtime during inspections. I once focused too much on brightness and overlooked access for maintenance. That mistake increased labor costs. Ask who provides technical support and how quickly spare parts arrive. Reliable documentation matters more than impressive demonstrations. Consider local weather, shade from trees, and seasonal sunlight before choosing the panel and battery size.
| No. | Buying Tip | Key Dimension to Check | Practical Benchmark | Why It Matters | Verification Method |
|---|---|---|---|---|---|
| 1 | Assess solar and battery sizing | Panel wattage, battery capacity, autonomy, and local solar resource | Choose a system designed for the site’s seasonal solar conditions and typically 2–3 nights of autonomy for critical outdoor lighting | Insufficient battery capacity can cause dimming or shutdown after cloudy or rainy days | Request a load calculation showing LED power, operating hours, battery usable capacity, and worst-month solar assumptions |
| 2 | Check outdoor durability | Ingress protection, corrosion resistance, operating temperature, and wind loading | Look for at least IP65 protection for the luminaire and suitable corrosion-resistant housing; confirm the project’s wind-load requirements | Dust, rain, condensation, salt air, and strong winds can shorten service life | Review test reports, enclosure ratings, material specifications, and structural calculations for the pole and mounting hardware |
| 3 | Evaluate LED lighting performance | Luminous efficacy, light distribution, color temperature, glare control, and useful life | Compare delivered lumens and photometric files rather than LED wattage alone; a 4,000–5,000 K color temperature is common for roadway applications | A higher wattage does not automatically provide better roadway visibility or uniformity | Ask for an IES/LDT photometric file and a lighting simulation based on pole height, spacing, road width, and target illuminance |
| 4 | Inspect smart-control capabilities | Dimming schedules, motion sensing, remote monitoring, fault alerts, and communication range | Prefer programmable dimming, such as reducing output during low-traffic hours, with manual override and clear control access | Smart controls can reduce energy use and help identify faults before a site visit is required | Request a live software demonstration, data-ownership terms, offline operation behavior, and communication specifications |
| 5 | Compare battery technology and protection | Battery chemistry, cycle life, temperature control, depth of discharge, and battery management system | Lithium-based batteries are widely used for compact systems; confirm a suitable battery-management system and manufacturer-rated operating temperature | Heat, overcharging, deep discharge, and repeated cycling affect capacity and replacement intervals | Check the battery datasheet, usable energy calculation, protection functions, replacement procedure, and warranty terms |
| 6 | Review maintenance requirements | Panel cleaning, vegetation control, fastener inspection, battery access, and spare-part availability | Plan periodic visual inspections and clean panels when dust, leaves, or bird deposits materially reduce solar input; use replaceable components where possible | Even low-maintenance systems need cleaning, inspection, and occasional component replacement | Obtain a maintenance schedule, access instructions, spare-parts list, labor requirements, and expected battery replacement interval |
| 7 | Verify safety, compliance, and total cost | Electrical protection, installation standards, warranty, logistics, and lifecycle cost | Include surge protection, correct grounding where required, documented testing, installation labor, battery replacement, and disposal costs | The lowest purchase price may become expensive if installation, repairs, or battery replacement are excluded | Compare a multi-year total-cost-of-ownership model and request certificates, warranty exclusions, commissioning records, and service response times |
Note: Actual performance depends on site latitude, shading, weather, mounting angle, traffic patterns, pole spacing, and local lighting requirements. Final specifications should be confirmed through a site survey and photometric design.
Buying all-in-one solar street lights requires more than comparing the lowest quotation. Check the complete cost, including poles, foundations, transport, installation, and future battery replacement. Ask for tested lighting data, not only claimed brightness. A 30-watt unit may perform differently under cloudy conditions or dusty panels.
Review the warranty line by line. Confirm coverage periods for the battery, solar panel, controller, LEDs, and housing. Ask whether labor, shipping, and replacement parts are included. Read the exclusions. Extreme temperatures, water entry, and poor installation may void protection. Request written battery-cycle information and a clear process for handling failures. Keep records.
Supplier reliability deserves equal attention. Request recent project references, factory inspection evidence, product test reports, and technical manuals. A responsive supplier should explain expected lighting hours after several cloudy days. Test one sample before ordering hundreds. It may reveal weaknesses in charging, motion sensing, or corrosion resistance. Do not rely on polished photographs. Check communication speed, spare-part availability, and after-sales response times. A cheap system can become expensive when one failed light waits months for support. I would also compare two or three detailed quotations, because missing specifications often create unfair savings.